A real Javi’s Decks project · St. Matthews, KY
How a Resurfacing Became a Complete Deck Rebuild in St. Matthews, KY
It began as a plan to replace a faded composite surface and rebuild the pergola. Once the old boards came off, the structure underneath changed everything.
Here is how the project changed, one decision at a time.

The plan was simple
Giving a Familiar Deck a New Surface
When this project began in early July 2026, the homeowner was not looking for a different backyard. He wanted to preserve the deck he had used for years and renew what time had changed.
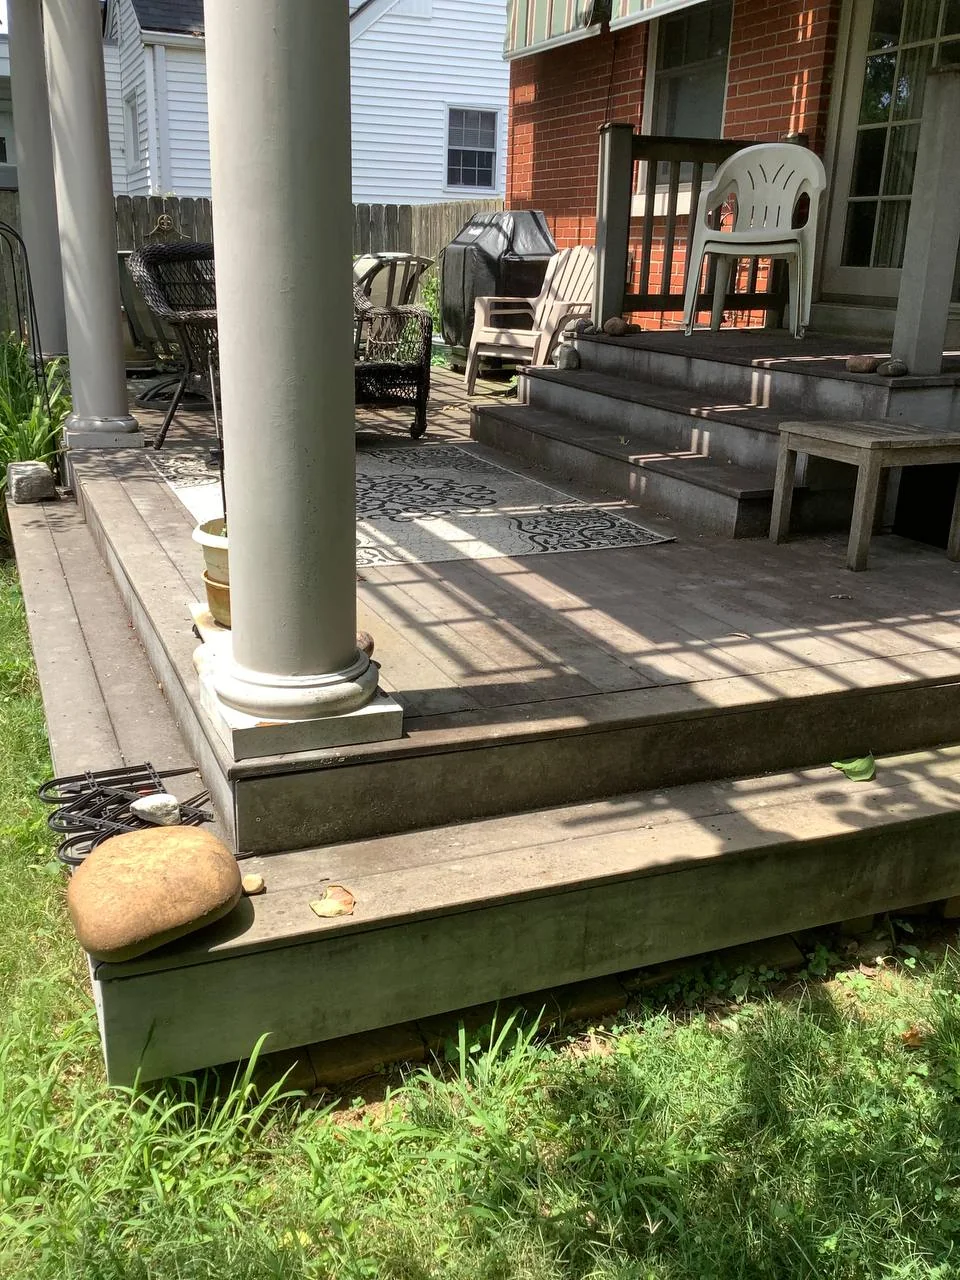
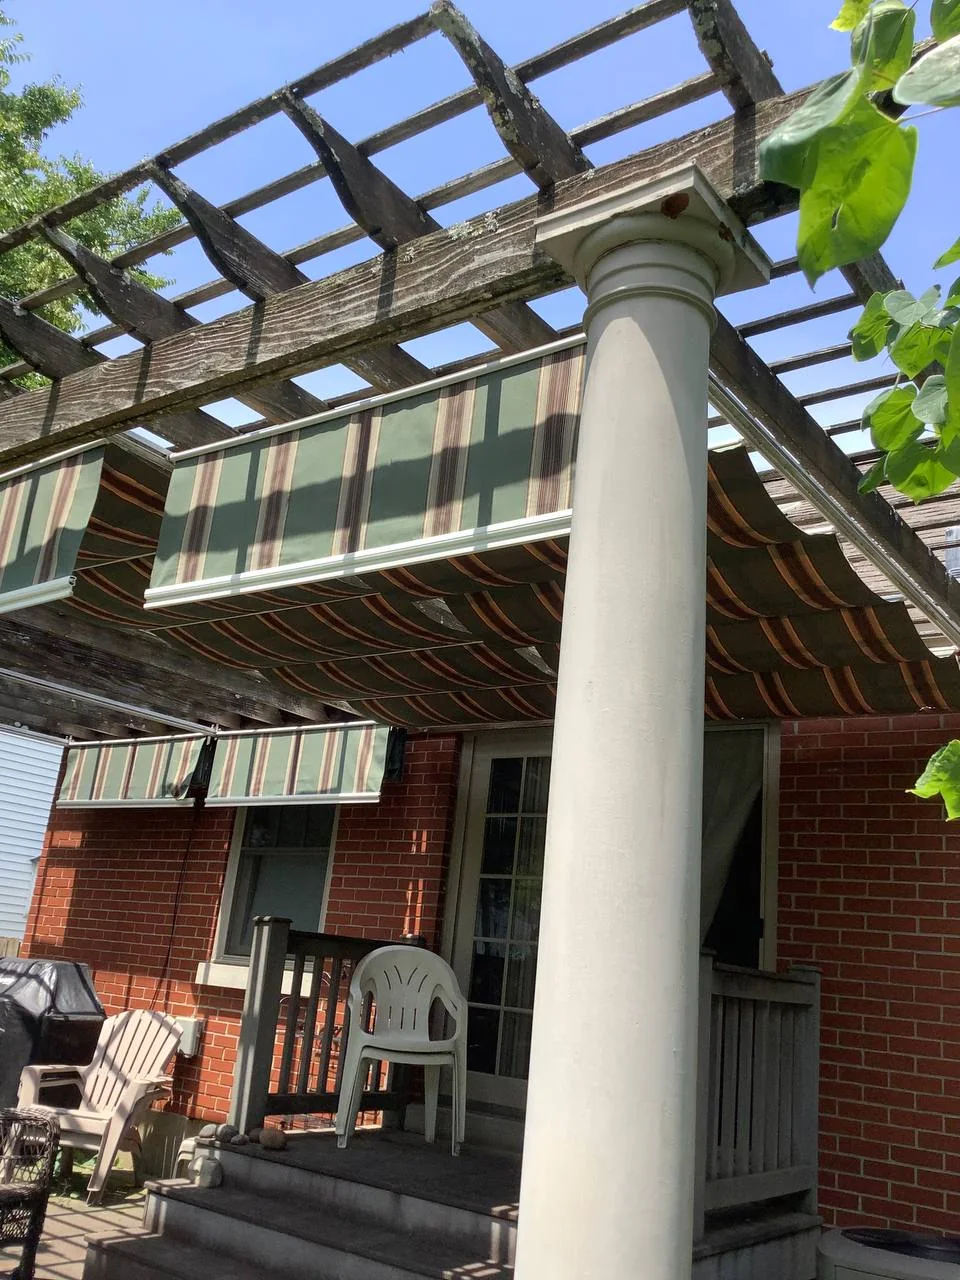
The composite surface was roughly thirty years old. It had lost much of its original color, but from above, it still looked like a reasonable candidate for resurfacing. The plan included Trex decking, a picture frame border, a center divider board, new railings at the landing and a rebuilt pergola.
The homeowner also wanted to preserve the existing pergola post covers so they could be refinished and used again.
Then the first boards came off
What the Old Composite Had Been Hiding
A deck can look tired on the surface and still have a frame worth keeping. It can also look serviceable while years of movement and moisture have changed what lies underneath.
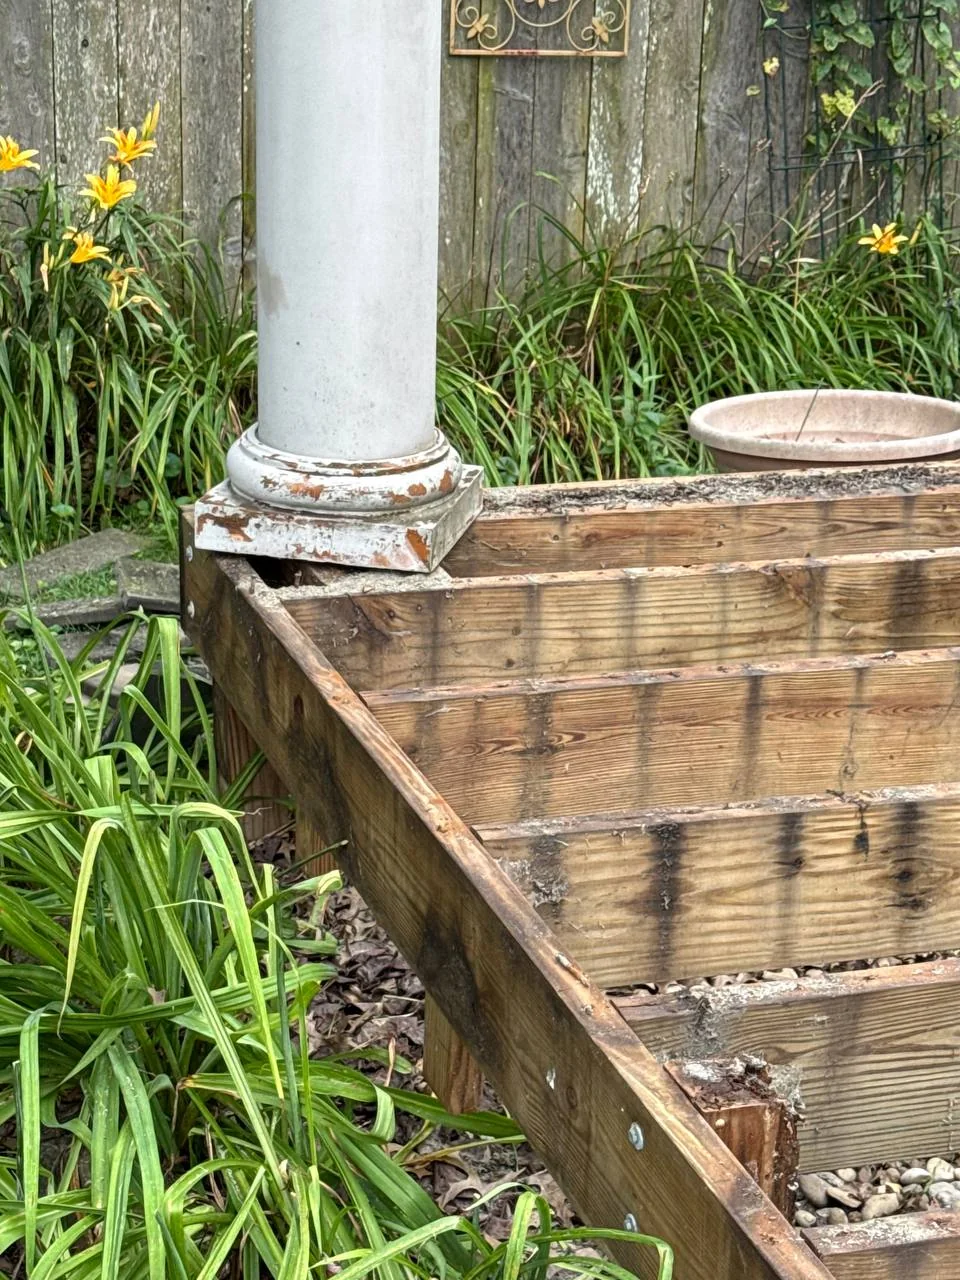
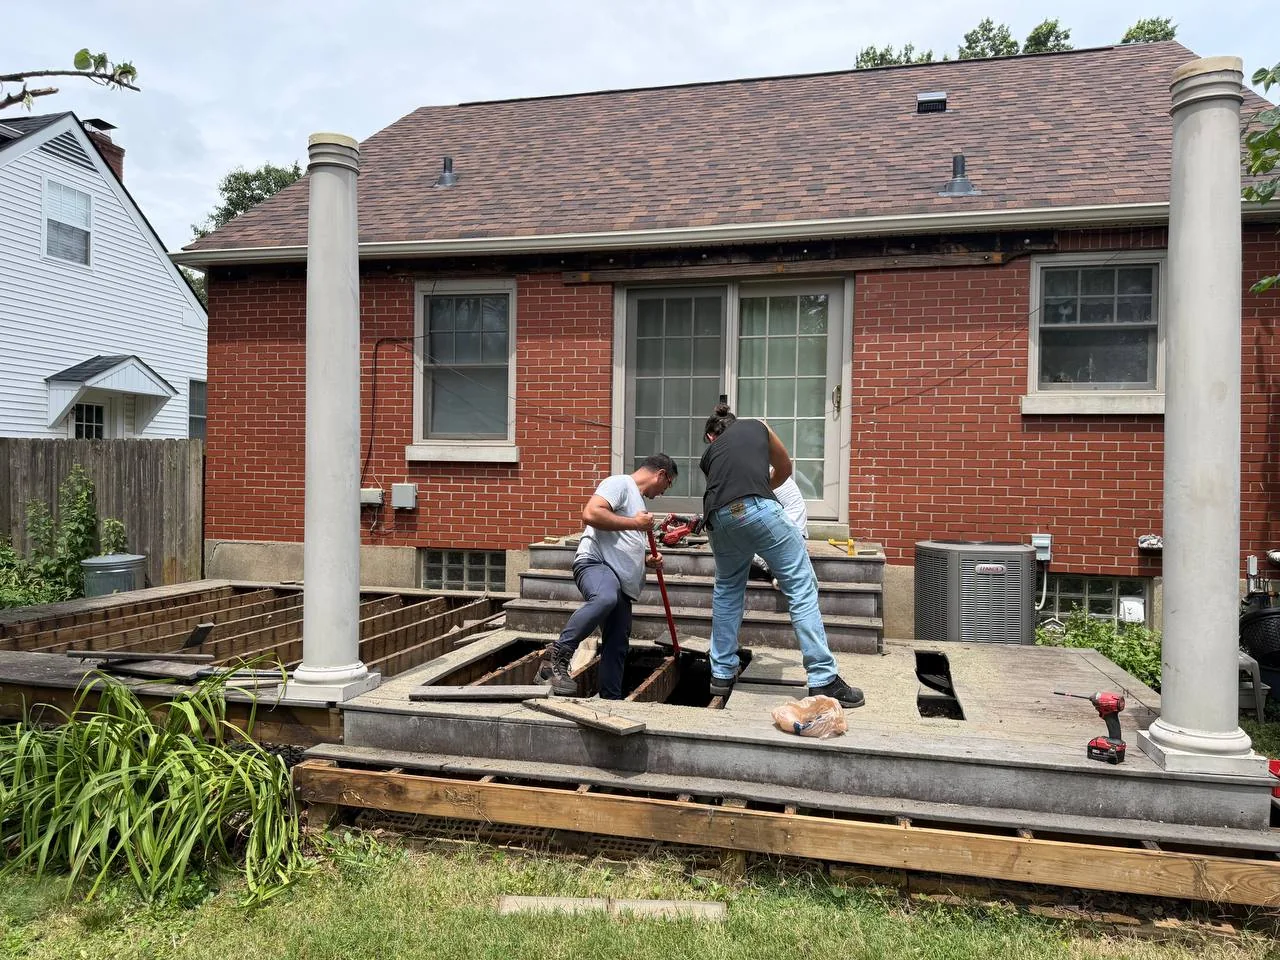
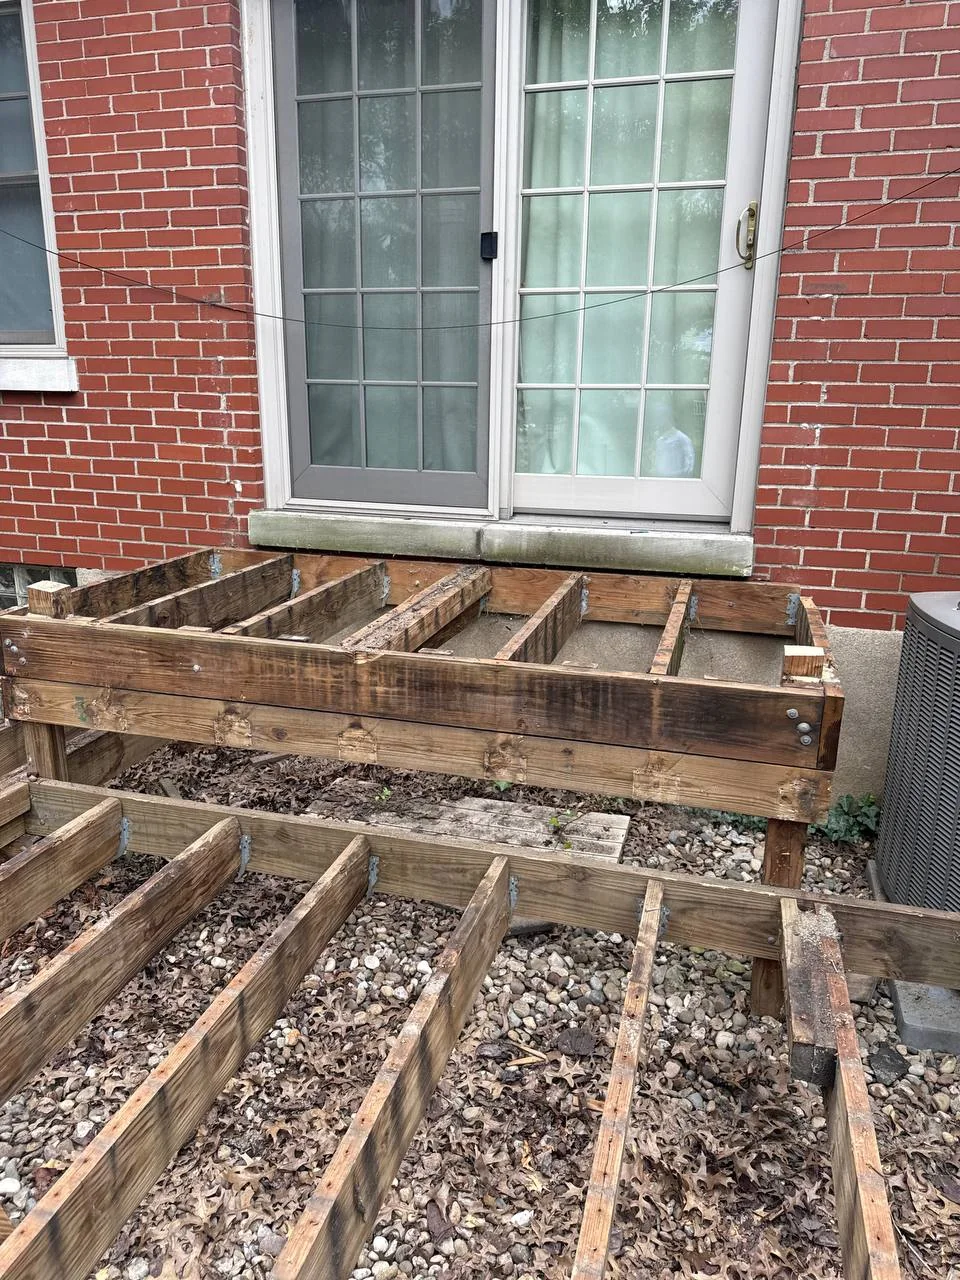
As we removed the old boards, the second possibility became clear. Several areas of framing had deteriorated, and the joists no longer formed a consistently flat surface. Some sat higher. Others sat lower.
New composite could cover those differences. It could not correct them.
The stairs confirmed the problem
This Was No Longer Just a Resurfacing
The existing steps had also become uncomfortable for the homeowner to use. Once the stair decking came off, we found that the stringers underneath were too deteriorated to build over.
At that point, the problem was no longer limited to one section. The surface, stairs, posts and framing all had to be considered together.
Before covering anything, we stopped.
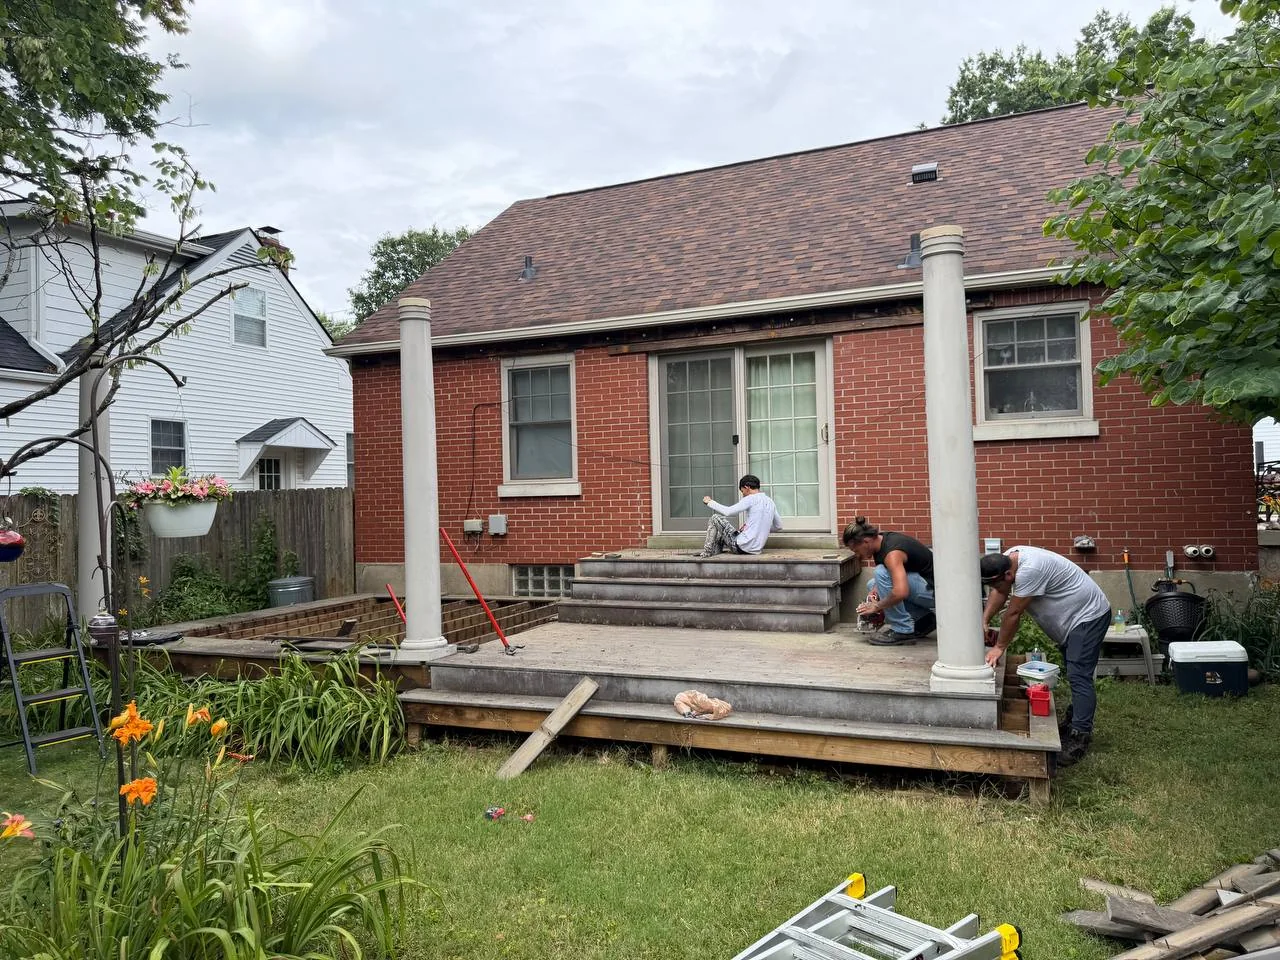
New decking can hide old framing. It cannot make it level.
One honest conversation changed the project
Rebuild It, and Do It Right
Javier stayed involved in the decision, showing the homeowner the exposed framing and explaining both paths before more work moved forward.
We could place new decking over the existing frame and accept the uneven result, or remove it and rebuild the deck correctly from the ground up.
The homeowner chose the second path. He did not want beautiful new material hiding a structure he no longer trusted.
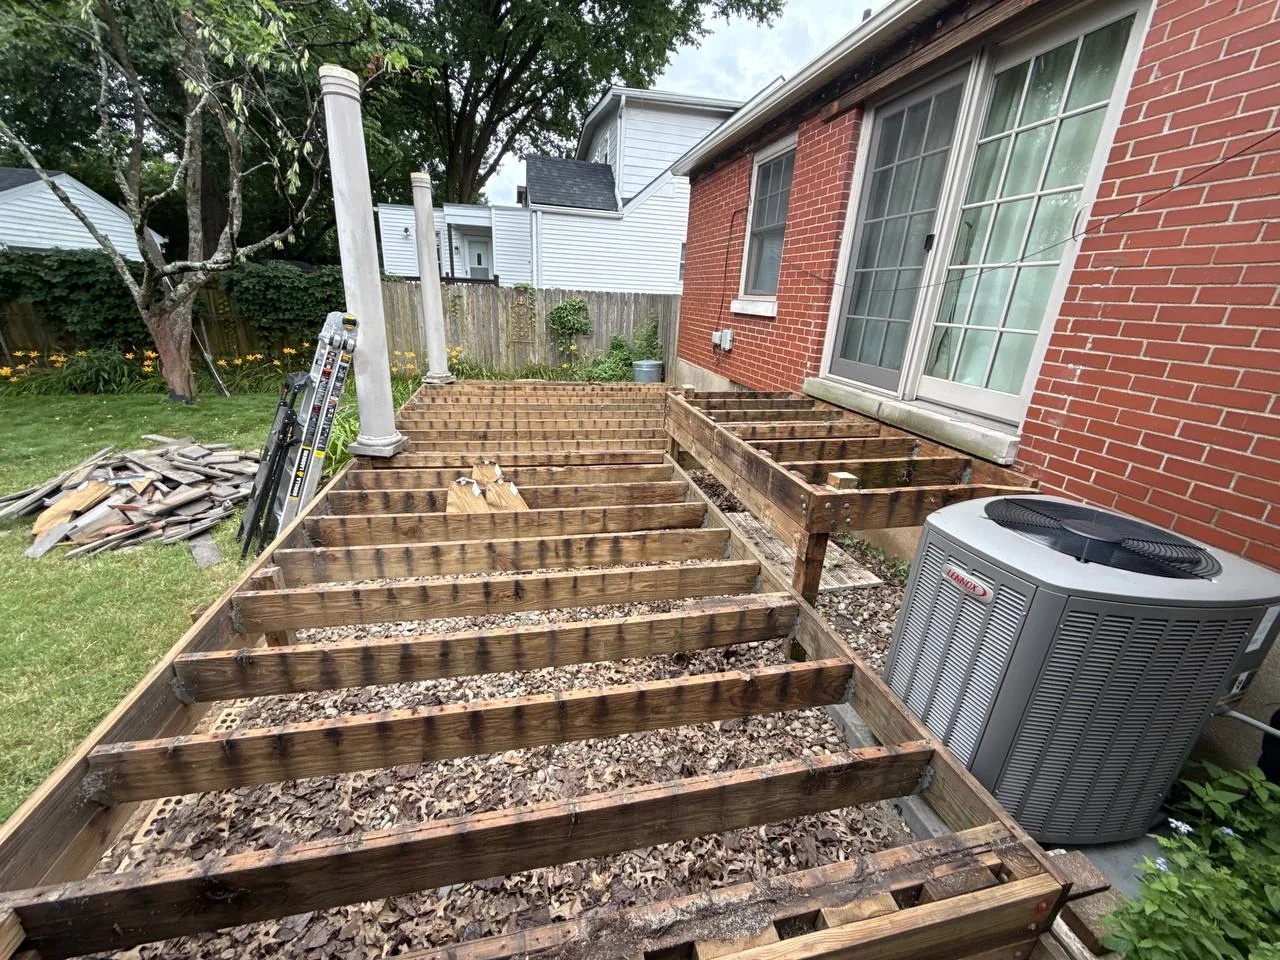
Thirty years came down
Clearing the Way for a True Rebuild
We dismantled the remaining frame, removed the old 4x4 posts and worked the embedded concrete out of the ground. Some posts released quickly. Others had considerably more concrete around them.
By the end of demolition, the familiar deck was gone.
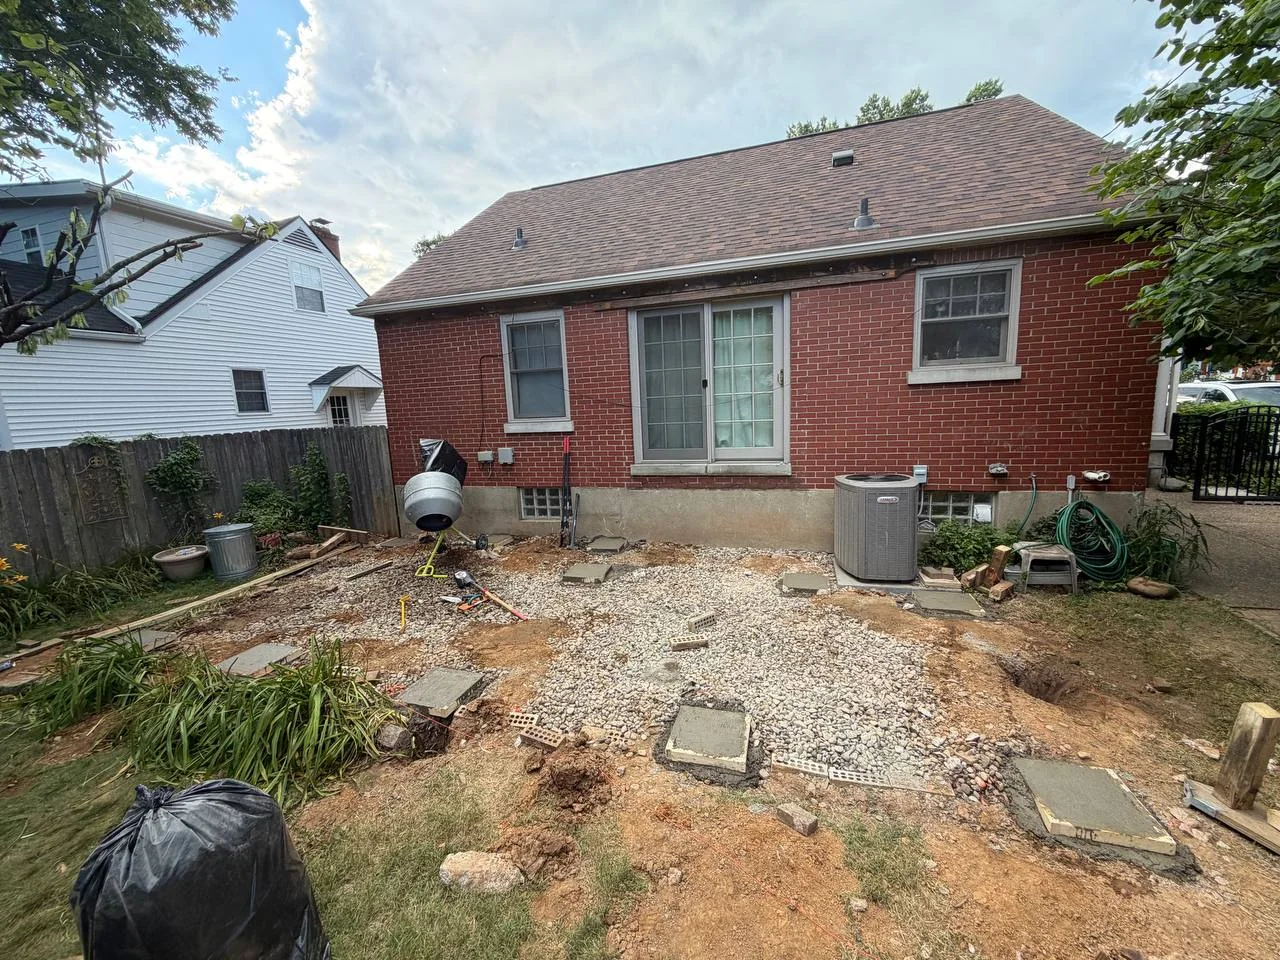
What remained was the same backyard, the same intended footprint and a clean opportunity to build the structure the finished design deserved.
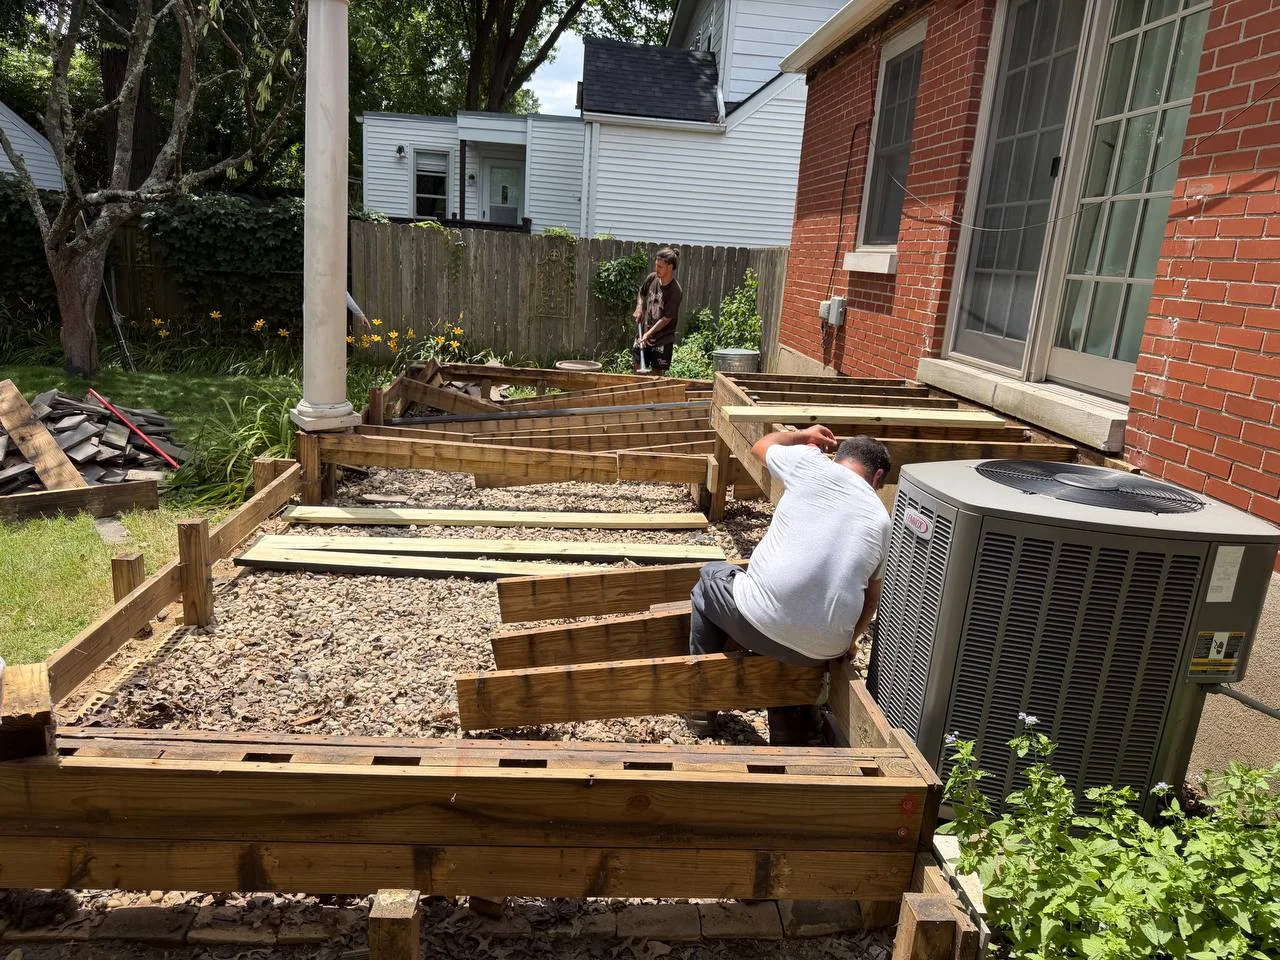
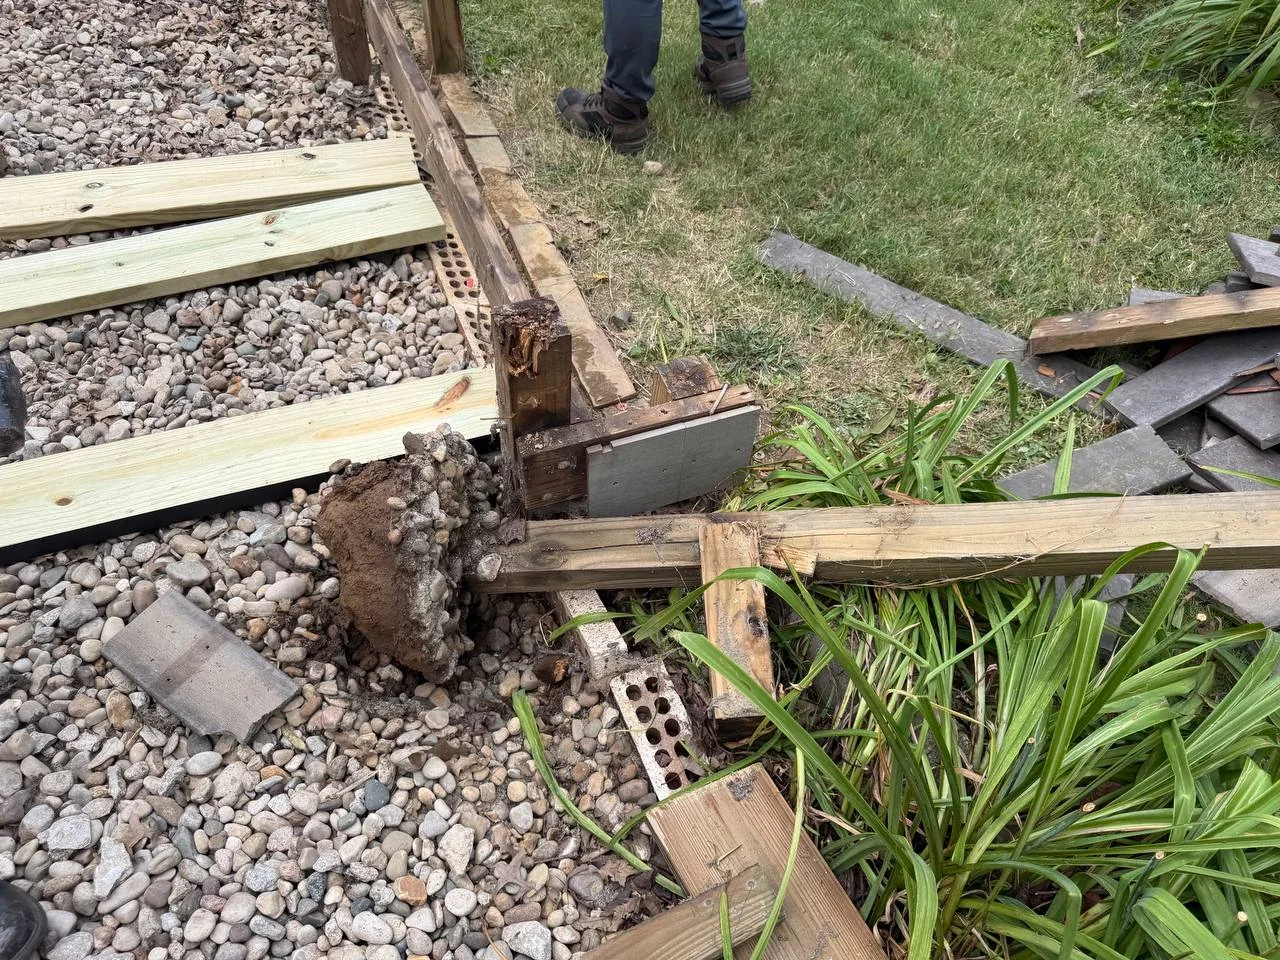
The homeowner kept the footprint. We replaced what the footprint depended on.
The rebuild began where no one would see it
New Footings, New Posts and a Better Starting Point
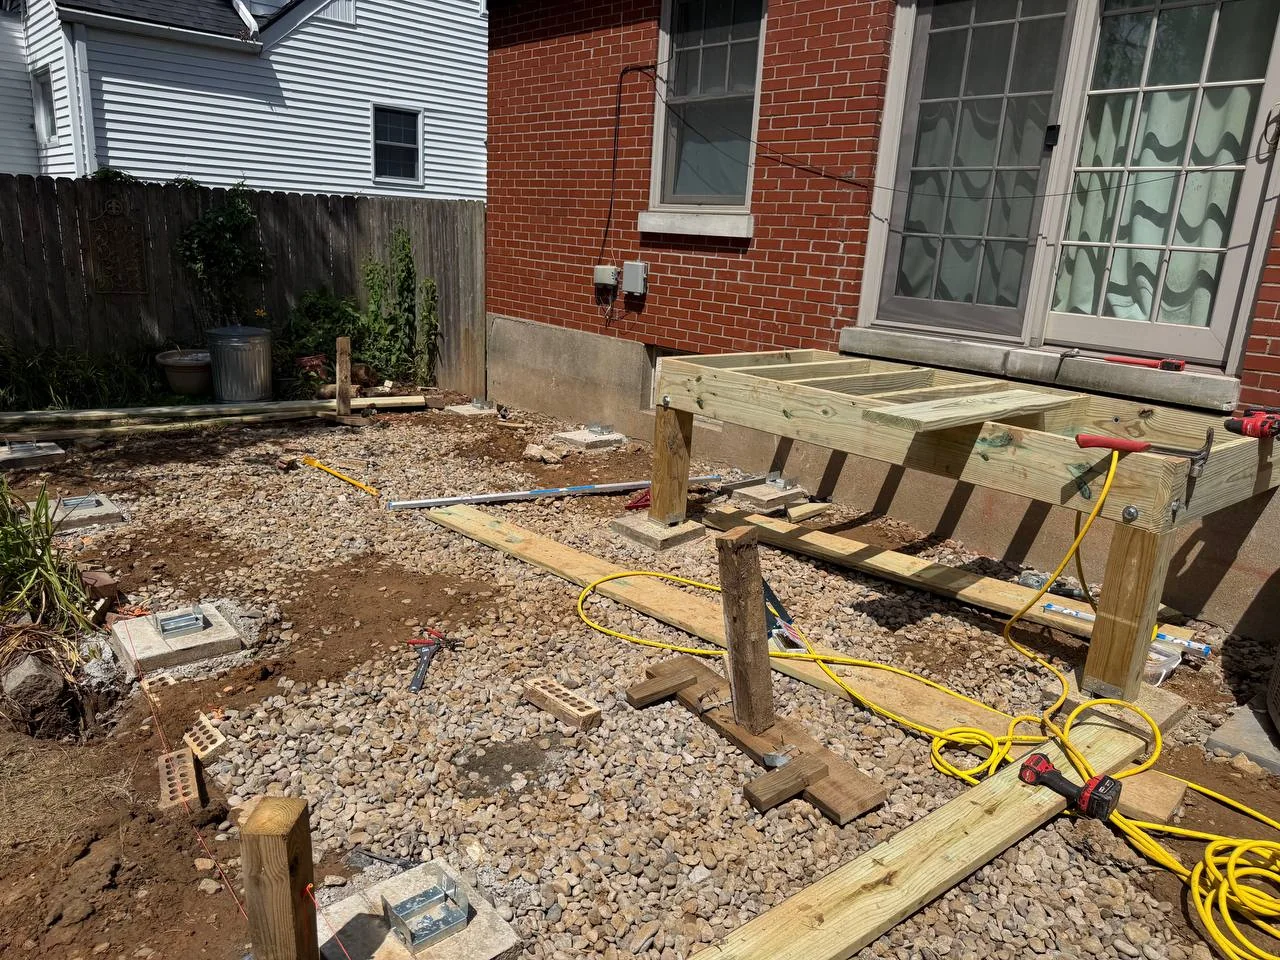
Keeping the deck about the same size did not mean copying its old geometry. The previous frame was not square, so the new structure was measured and laid out from the beginning.
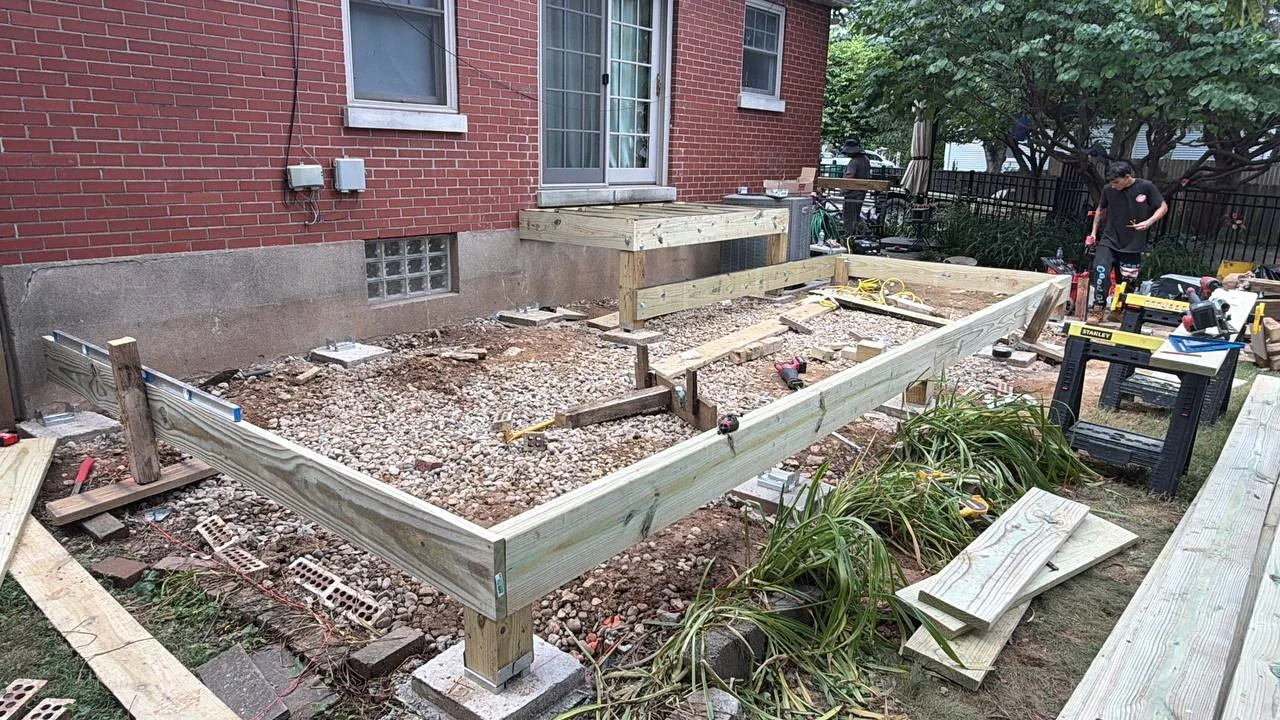
New footing holes were excavated approximately 38 to 40 inches deep. After the concrete was ready, we installed Simpson post bases and new ground contact pressure treated 6x6 posts.
The elevated bases separate the bottom of the wood posts from direct contact with the concrete and create a connection that can be serviced more easily if a post ever needs attention in the future.
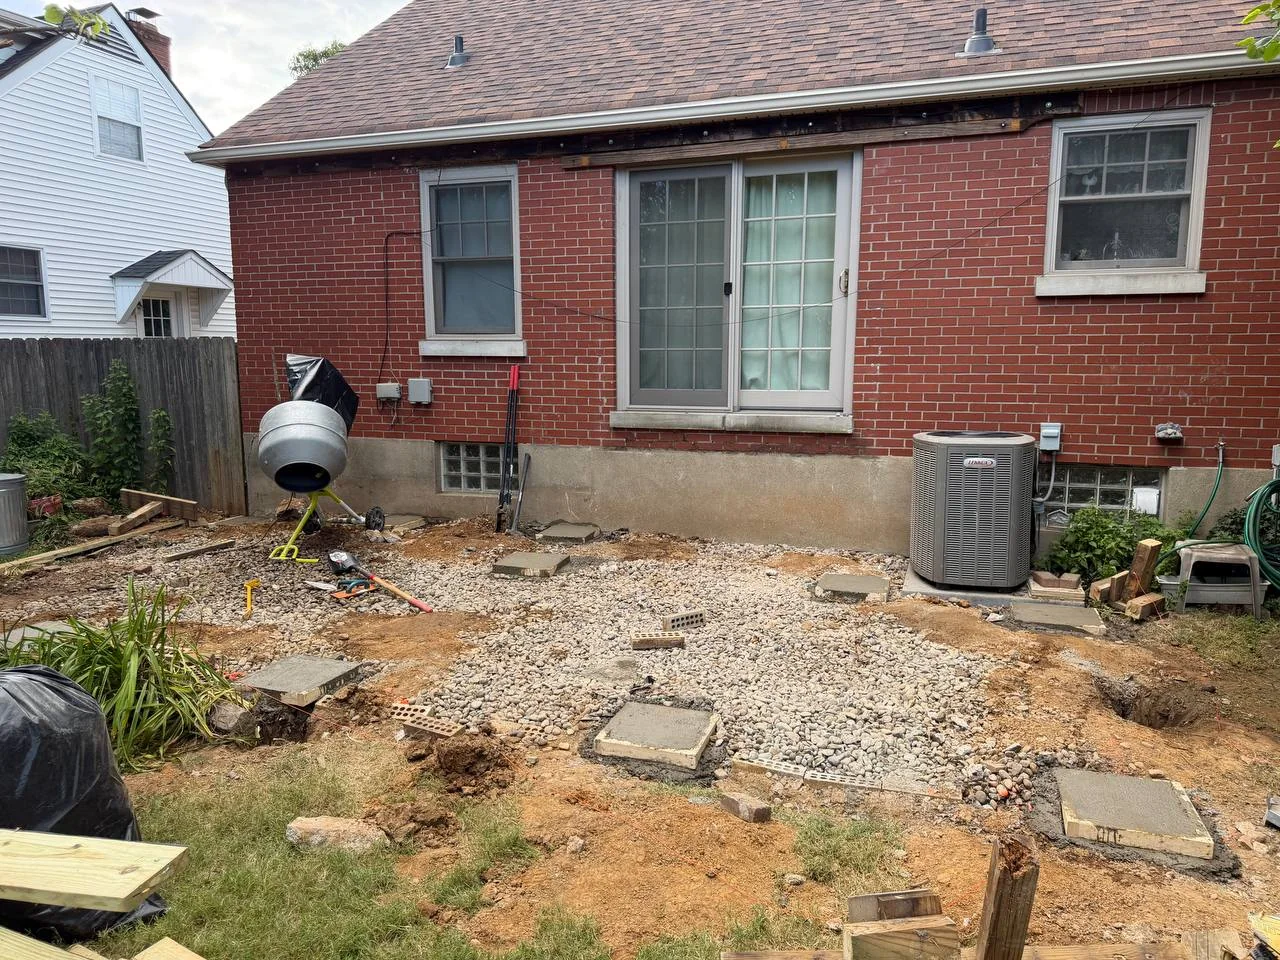
The shape returned
Building a Self Supporting Deck From the Ground Up
The landing was one of the first familiar parts of the deck to return. From there, we framed the main structure around a double beam support system.
The new deck was designed to support itself instead of depending on a structural deck ledger fastened to the home. This avoided an unnecessary structural connection to the house and gave the deck its own support system.
Slowly, the empty yard began to look like the homeowner’s deck again. This time, the lines were square and the structure was new.
The details that disappear later
Preparing the Frame for Every Finished Line
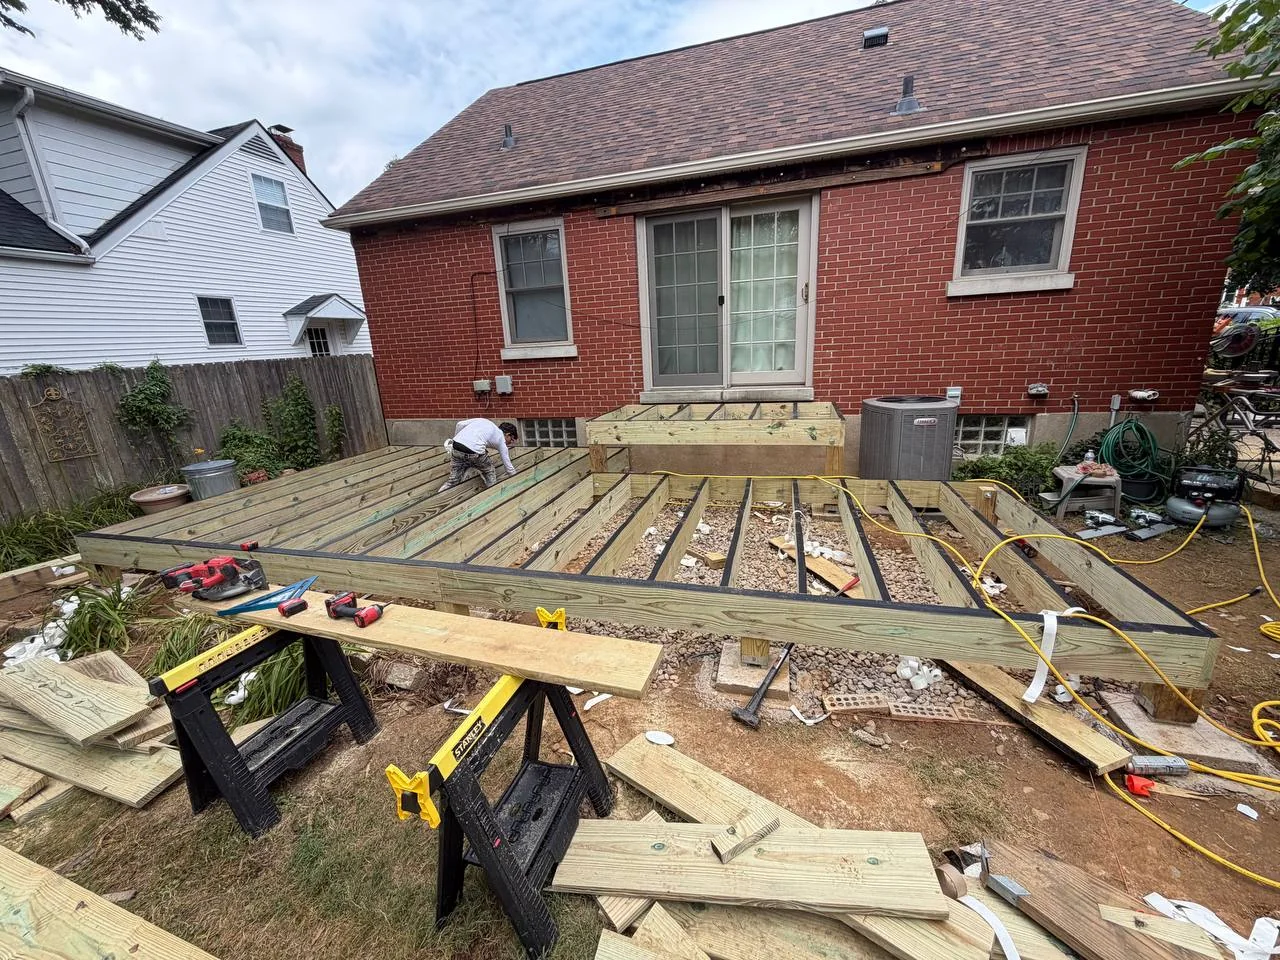
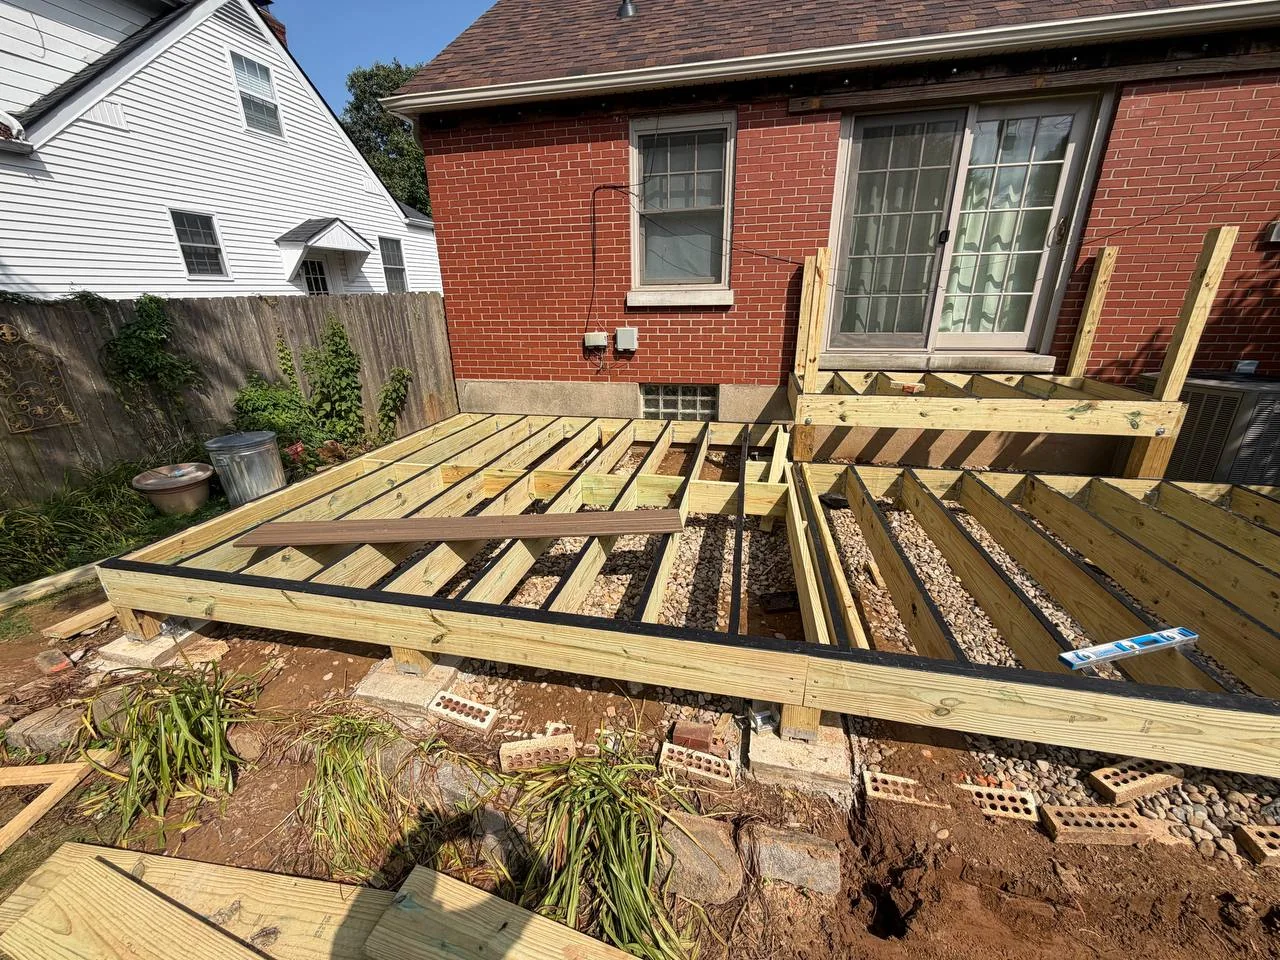
Joists, hangers and blocking completed the main structure, but the finished pattern had to be planned before the first Trex board could be installed.
Extra framing was positioned exactly where the picture frame border and center divider board would need support. We also applied joist tape over the top edges of the framing to help protect the wood around the decking connections and fastener points.
Once the decking is installed, this work disappears. That is precisely why it matters.
A better way down
Rebuilding the Stairs on Solid Ground
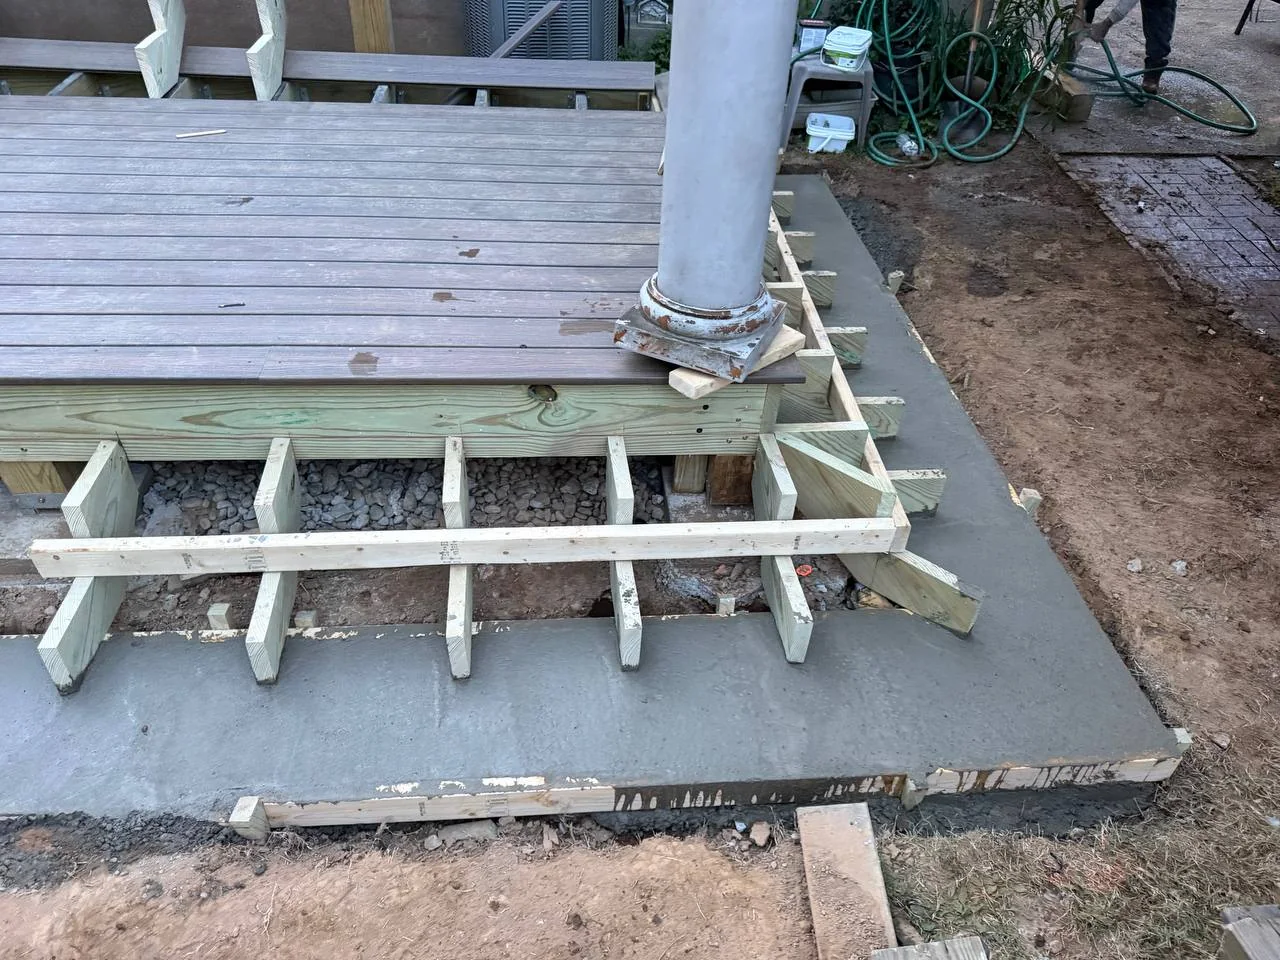
The new stairs were not treated as an afterthought. New stringers were laid out to create a more comfortable transition between the deck and the yard.
At the bottom, we prepared a dedicated concrete landing so the finished stairs would not end directly in the soil.
The work was sequenced carefully to keep wet concrete, mud and unnecessary traffic away from the new composite surface as much as possible.

The transformation finally became visible
Installing Trex Enhance in Toasted Sand
The frame had required weeks of decisions. The new surface made those decisions visible one board at a time.
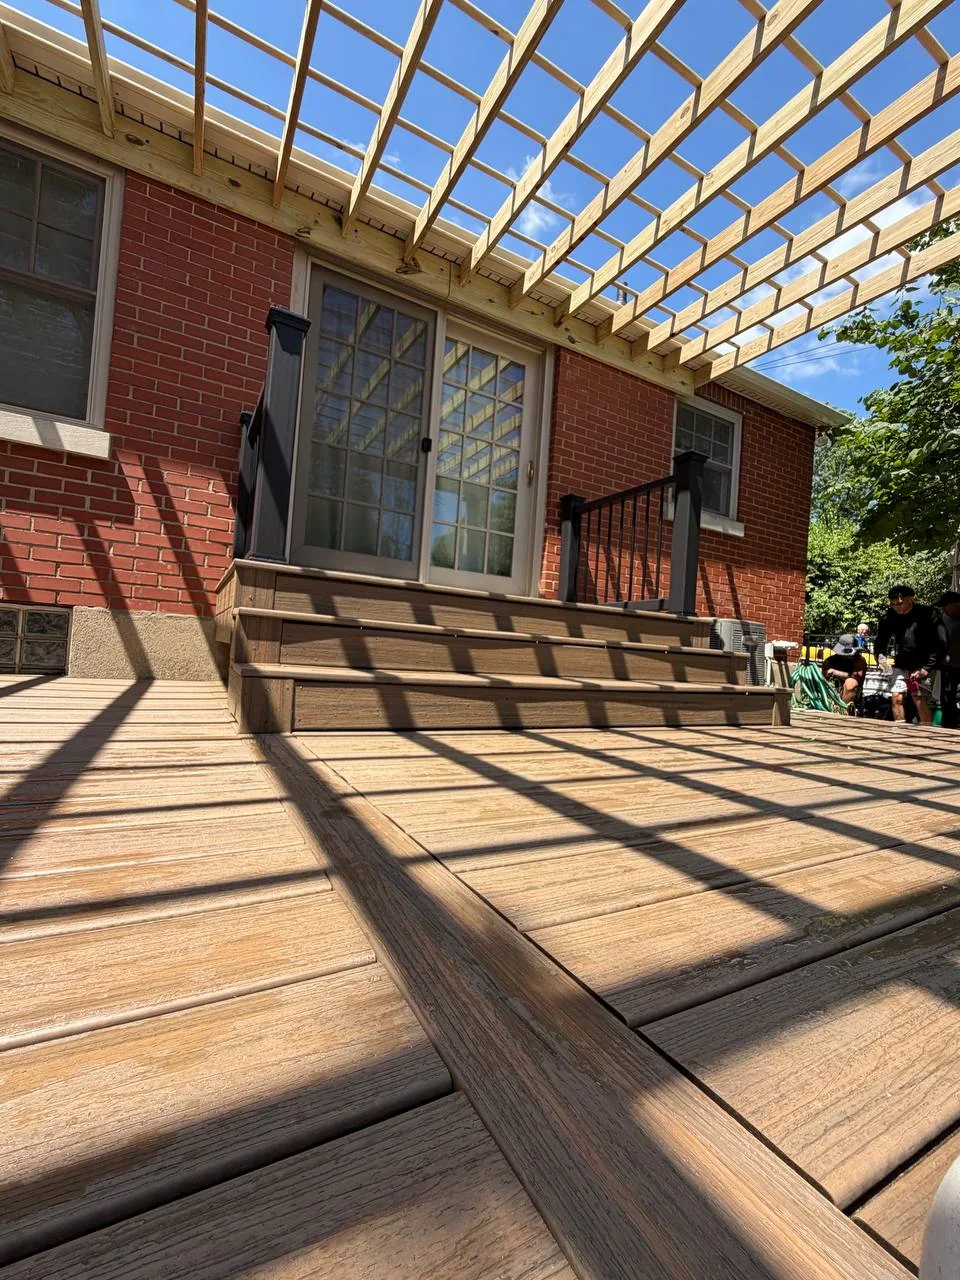
We installed Trex Enhance composite decking in Toasted Sand, using hidden fasteners throughout the main field and color matched plugs where face fastening was necessary.
A picture frame border finished the perimeter. The center divider board gave the long surface a deliberate break and kept the layout visually balanced.
The deck was nearly finished. The project was not.
New Railings and a Rebuilt Pergola
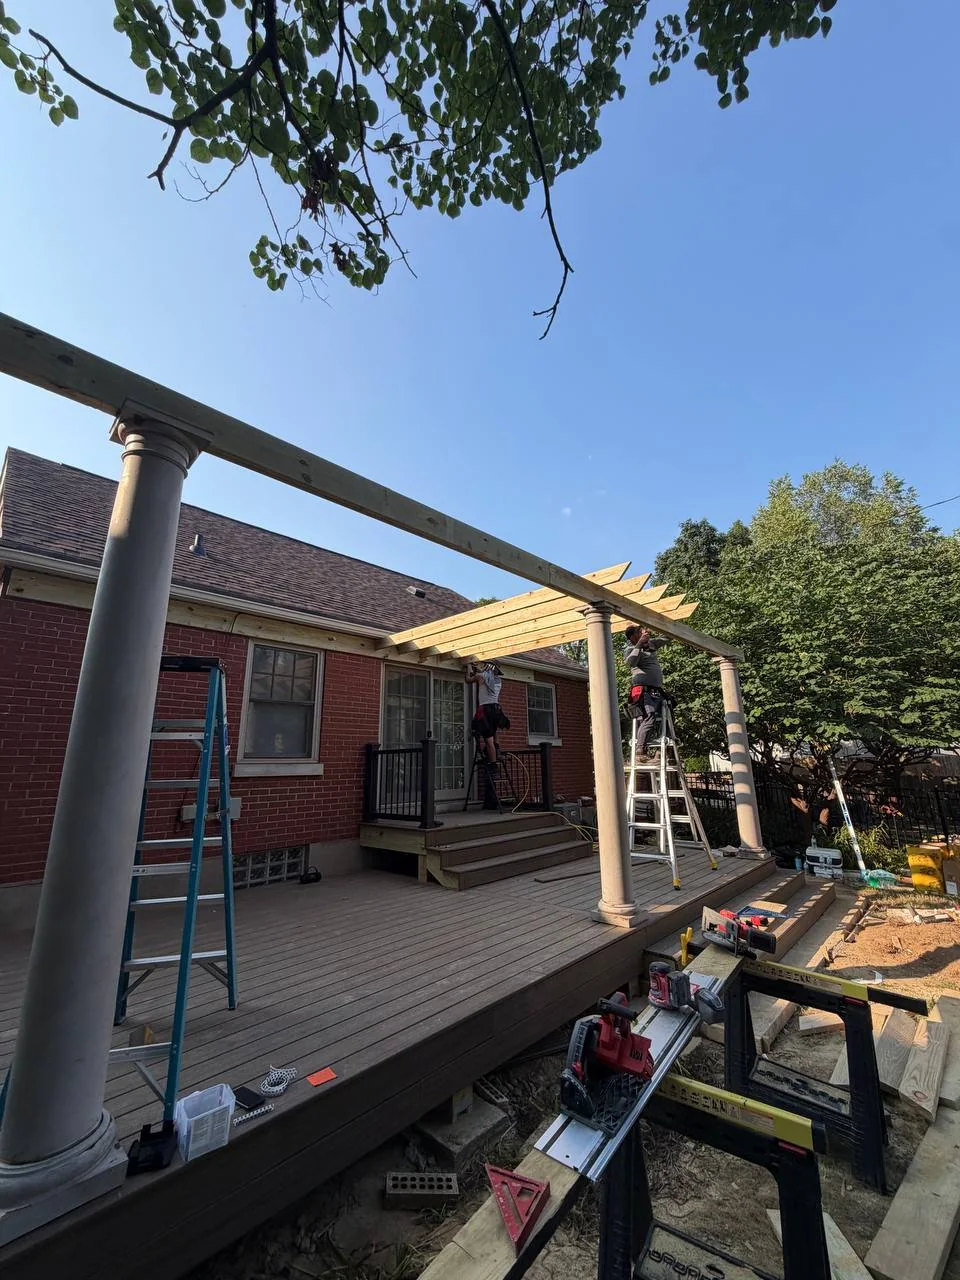
Once the decking and stairs were complete, the original landing railings gave way to a new Trex railing system in Charcoal Black. The darker frame created a clean contrast with the warm Toasted Sand surface.
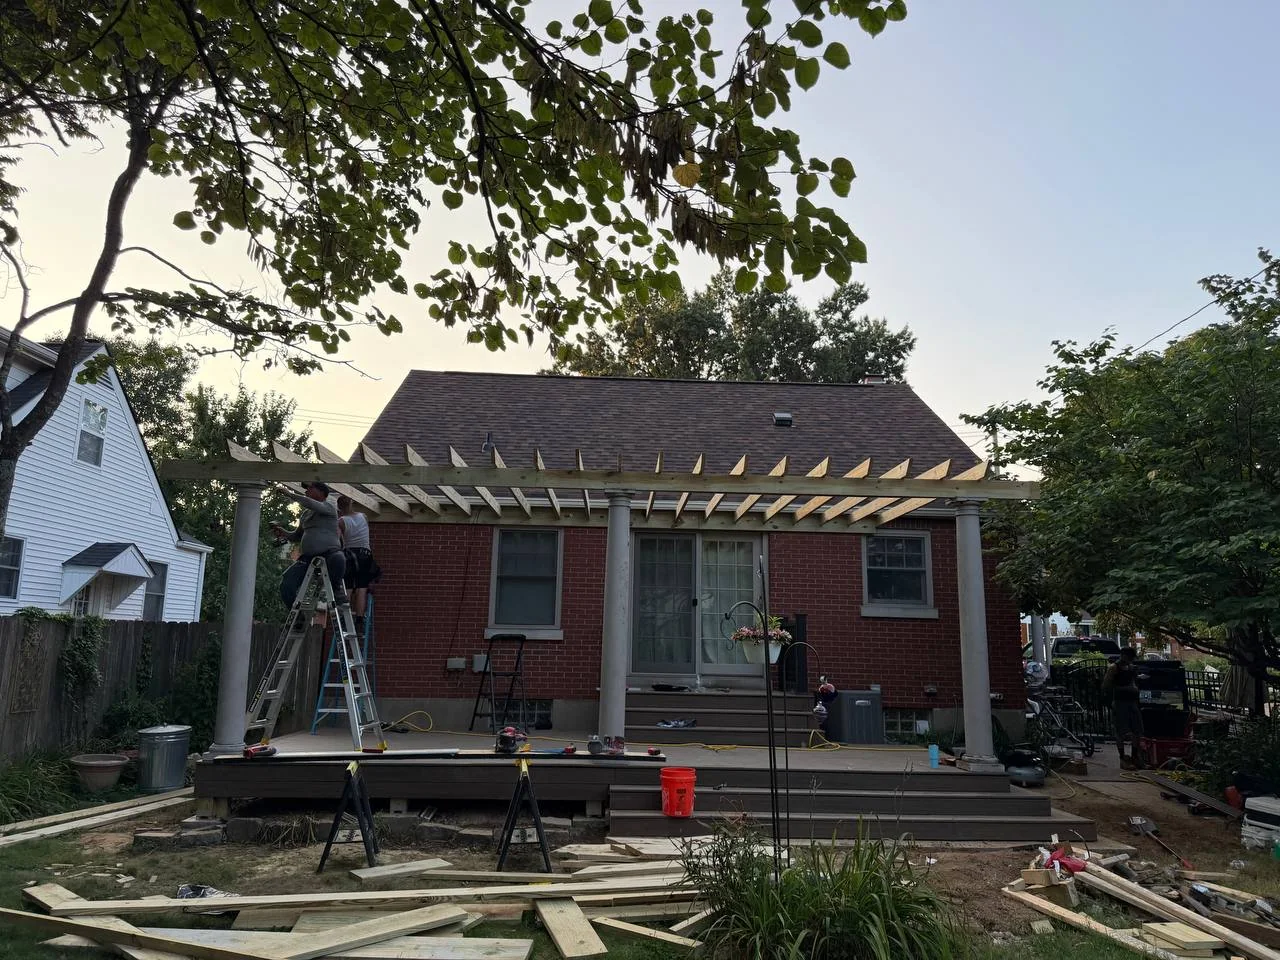
Above the deck, we prepared the wall side support for the new pergola, then installed the rafters and upper members around the post covers the homeowner wanted to preserve for refinishing.
The deck had its finished surface. Now the structure that made it feel like an outdoor room was returning too.

The result · St. Matthews, Kentucky
The Same Backyard, Rebuilt From the Ground Up
What began as a surface update became a complete deck rebuild with new footings, 6x6 supports, a self supporting frame, new stairs, Trex Enhance decking, Charcoal Black railings and a rebuilt pergola.
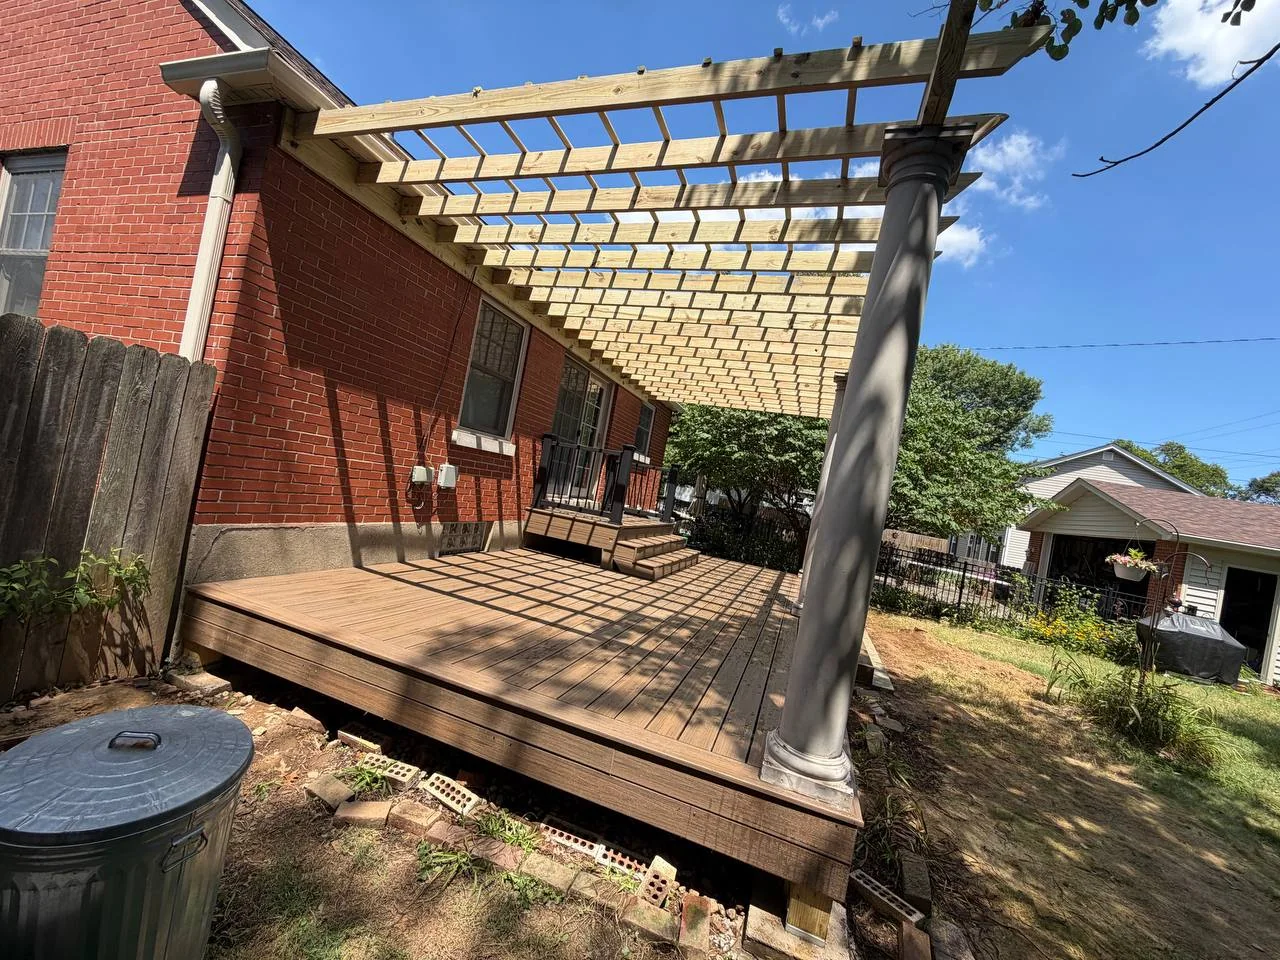
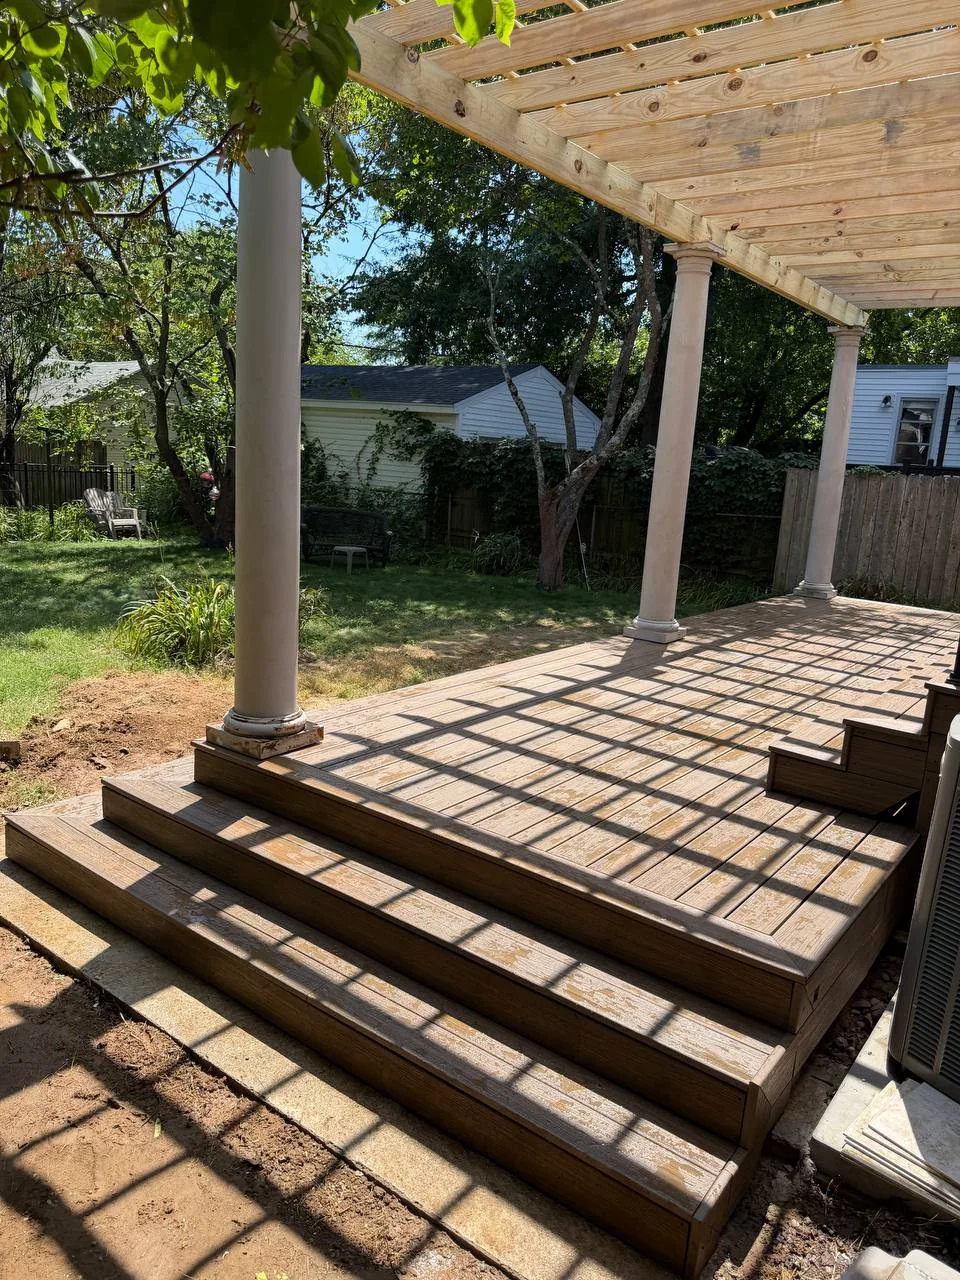
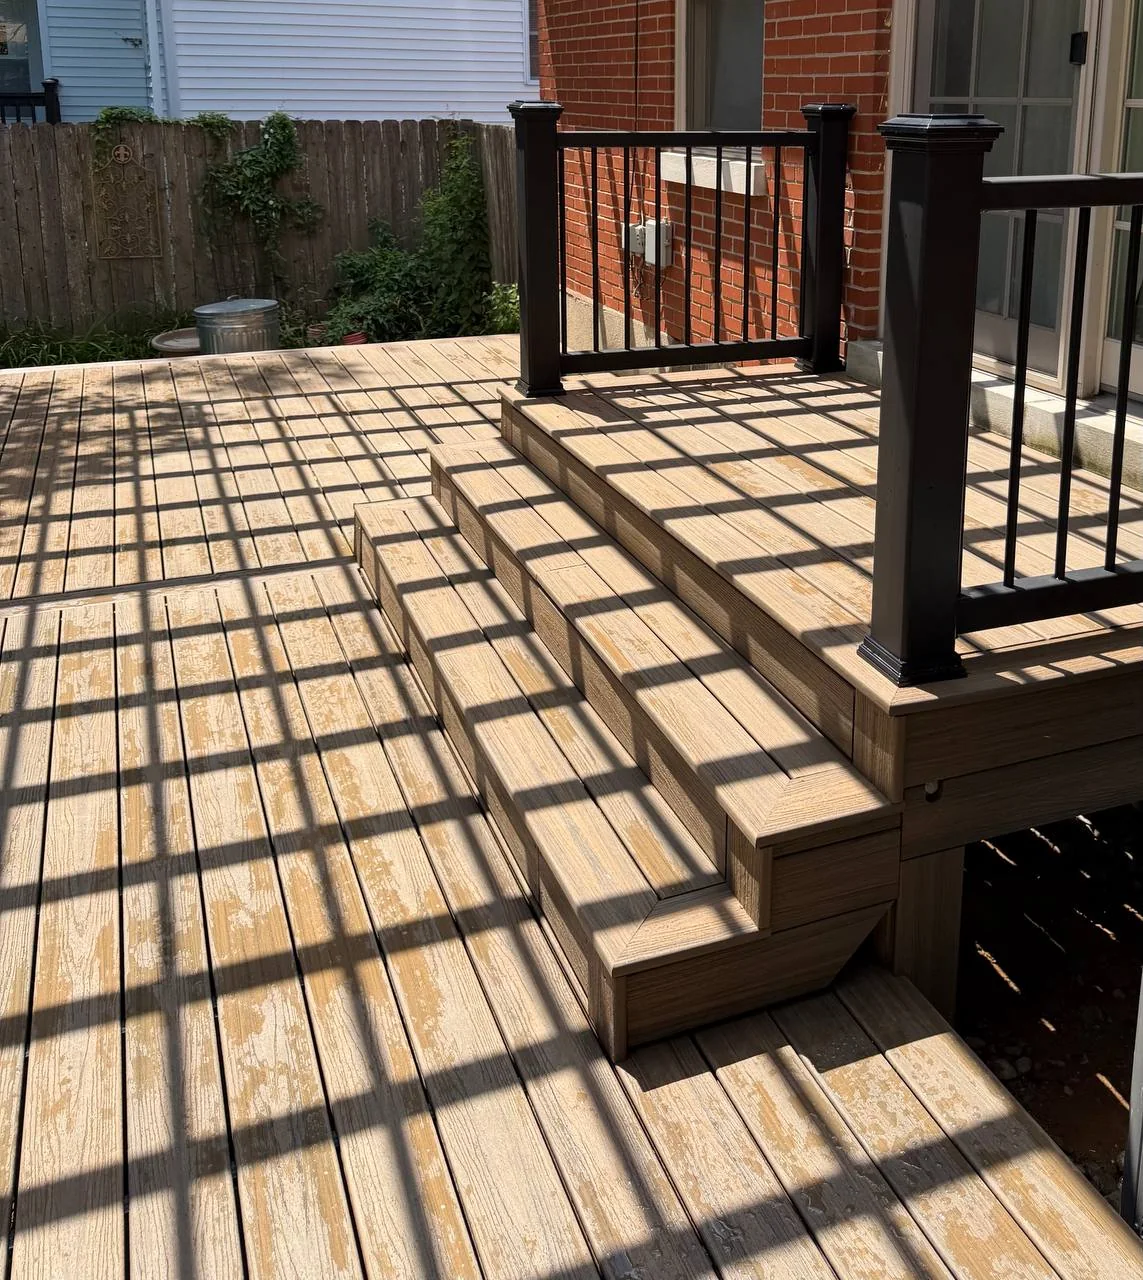
The homeowner kept the size, layout and outdoor space he already knew. What changed was everything supporting it, including the details that will rarely be seen again.

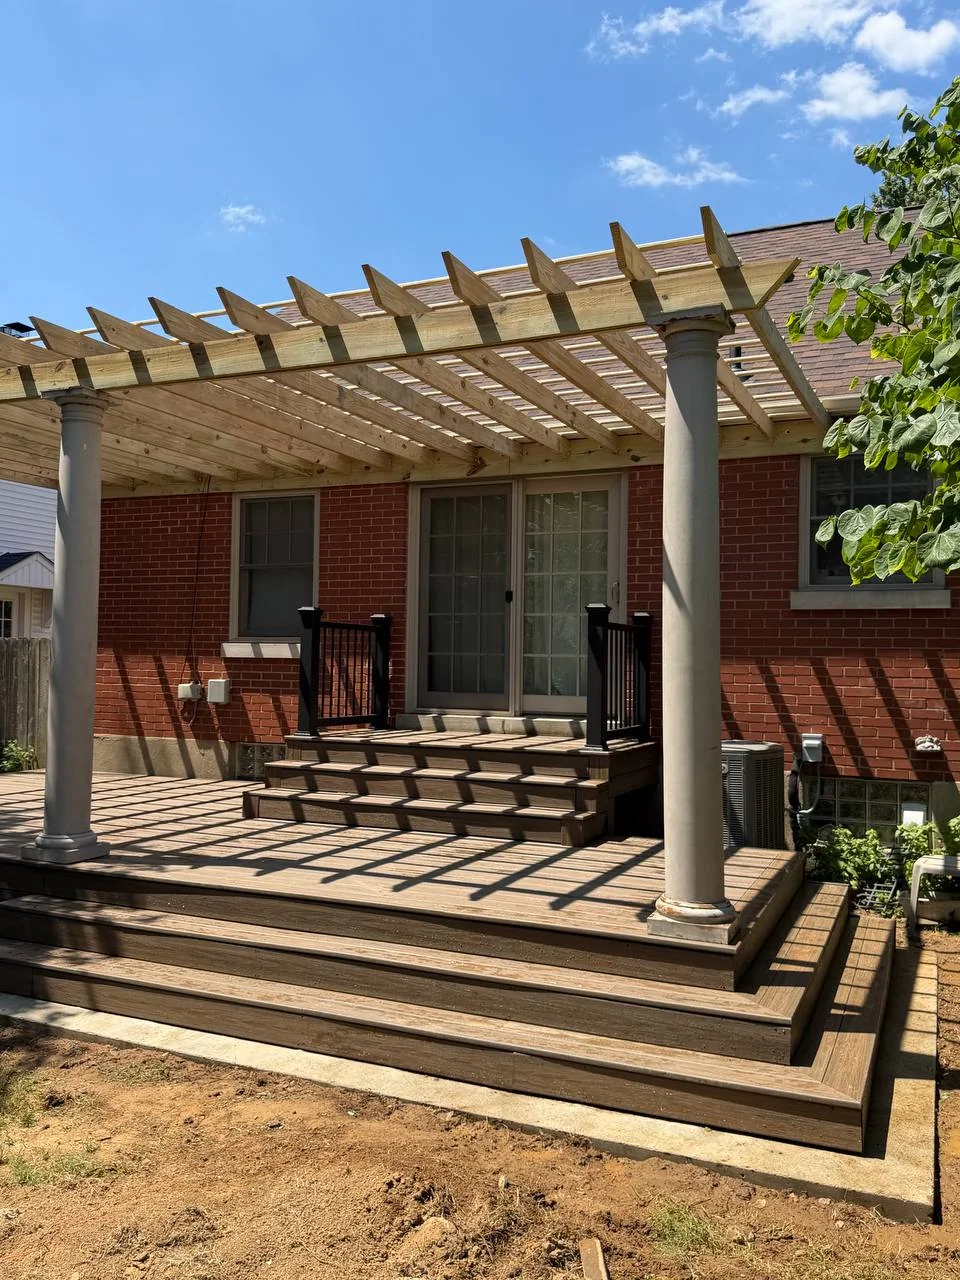
This was not the project we expected when the first boards came off. It became the kind of project that defines how we work: show the homeowner what we find, explain the real options and build the approved solution with care from the ground up.
Does Your Deck Need More Than New Boards?
An aging surface does not always mean the entire deck must be rebuilt. It also does not guarantee the framing is ready for resurfacing.
Send us a few photos or schedule a deck visit. We will look at the surface, structure, stairs and railings, then explain whether repair, resurfacing or replacement is the practical next step.
Most clients hear from us within 5 minutes.
Tell Us About Your Deck
A closer look at the work